Want to learn how to optimize images for the web?
Image optimization is a crucial part of website management that’s often overlooked by new blog and website owners.
In this post, we teach you how to optimize images for your website by mostly focusing on how to accomplish this with free tools.
Why you need to optimize images for the web
Optimizing images for the web is important for several reasons, namely user experience and SEO.
All web pages are made up of files of varying sizes that all contribute to a page’s total size. The larger a page’s size, the longer it takes to load.
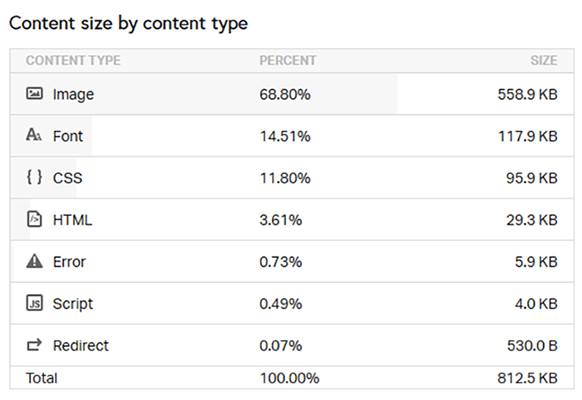
Images contribute quite a bit to a page’s total size. If you don’t pay attention to image sizes, your pages will take longer to load.
This results in poor user experience, which results in higher bounce rates.
Not only that, page speed and performance are ranking factors, so you’ll also find your site falling lower and lower in search engine rankings, which will result in less organic traffic.
Fortunately, optimizing images is easy and cheap when you use the right image optimization tools.
How to optimize images for web pages with free tools
Let’s talk about tools that allow you to optimize images in the following ways:
- Compressing images before they’re uploaded.
- Compressing images as they’re uploaded.
- Compressing images that have already been uploaded.
Compressing images before you upload them
If you shot or are creating the image yourself, your image editing software should have compression settings you can adjust before you export the final result.
However, keep in mind that image compression does result in poorer image quality.
The ultimate goal of image compression is to reduce the size of an image file without reducing the quality of the image itself.
Do some research on your image editing software if you want to do this yourself before you export.
If not, use an image compression tool that’s designed to compress images without reducing image quality.
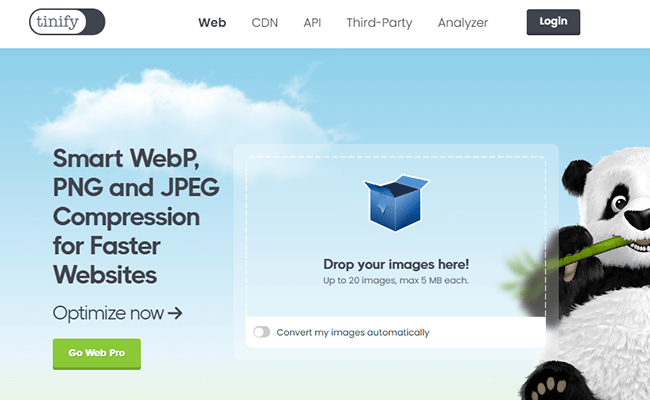
One such tool is TinyPNG. This tool compresses up to 20 PNG, JPEG or WebP files at a time for free, so long as their total size is smaller than 5MB.


Optimizilla is another great option. It compresses JPEG, GIF and PNG images.
Compressnow and JPEG Optimizer are great as well. They compress PNG, GIF and JPEG images. However, they let you choose how much their tools should compress images.
While this is a nice feature to have, it can make image compression a little more complicated for beginners. Fortunately, you’ll do just fine leaving these tools at their default configurations.
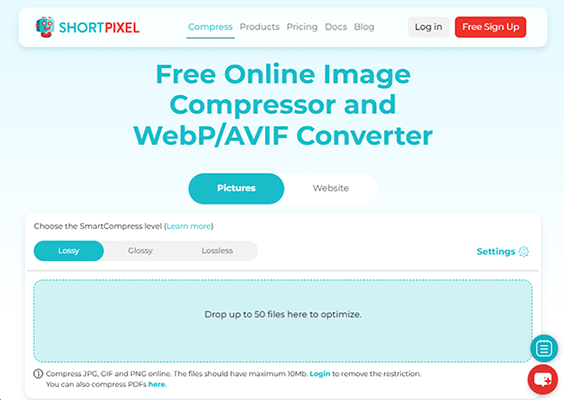
ShortPixel is a fantastic option for larger projects. It allows you to compress up to 50 JPG, PNG or GIF files for free, so long as their combined size is less than 10MB.
It also lets you choose a compression level.


Compressing images as you upload them
Fortunately, there is a way to automate image compression, and that’s by compressing them as you upload them to your website.
A plugin like NitroPack applies image compression across your entire site while also converting images to WebP for better performance.
NitroPack’s primary function is to apply page caching and browser caching to your website to vastly improve its performance.
You can view just how effective the plugin is in this regard by reading our review of NitroPack. It includes data from real tests.
Image optimization is a secondary feature of the plugin, but it’s available with free plans.
You can choose an image quality the plugin should keep images at as it compresses them. Google recommends keeping image quality at 80%, so NitroPack has it set to this setting by default.
This means that as far as image compression goes, you should be okay to install NitroPack without configuring it.


As you can see, the plugin also implements lazy loading.
It can also implement adaptive image sizing if you have the Growth plan or higher. This feature resizes larger images so they fit within your site’s container dimensions without reducing image quality.
However, you should get into the habit of optimizing image dimensions before you upload them to your site, anyway. This will make NitroPack’s image optimization functionality much more effective.
Other popular image optimization plugins that compress images you upload to WordPress automatically include EWWW Image Optimizer, Smush, ShortPixel, Optimole and TinyPNG.
If you use an all-in-one platform, such as Shopify or Wix, you may discover that they implement image compression for you.
This means you don’t need to worry about compressing images before you upload them nor do you need to worry about installing addons, plugins, tools or apps.
Compressing old images
If you have a WordPress site, NitroPack and many of the other plugins mentioned will compress images that are already uploaded to your site.
If your older images are quite large in dimension, as in much larger than 1000 x 1000px, you may want to resize all of them offline and replace them.
You can compress them all you want, but if they’re already quite large to begin with, compressing them by 20% likely won’t do much.
We have guidelines on how to measure the effectiveness of your image optimization efforts detailed below. Follow them to determine if you need to go through with resizing all of your images.
You can also try some of the other image optimization tips we list below.
Other ways to optimize images for web pages
Use the right image file type
There are two main file types you should use for web pages: JPEG (or JPG) and PNG.
Here’s when to use each:
- JPEG – Use this file type for photos with real subjects as well as images with deep, rich colors.
- PNG – Use this file type for screenshots, images with a lot of text, images that have transparent backgrounds, graphics and infographics, and flat illustrations.
There’s also the GIF file type, which is great for animated images, but we recommend sticking with one of the other two formats for everything else.
What is WebP?
WebP is a newer image format that has the ability to use lossless and lossy compression that’s more effective than PNG and JPEG but still rich and high-quality in appearance.
Mainstream browsers support the WebP file format as does WordPress, but it’s not as widely supported as JPEG and PNG, so it’s taking some time for the world to adopt the newer format.
Even so, you can use a WordPress plugin to convert your images to WebP for better performance.
When you create images yourself, you should be able to export them as WebP.
Compress images before you export them
If you create your own images, research the editing software you use to determine if it’s possible to compress images as well as how to do so.
All editing software is different and different images have different needs, so it’s best to do a bit of research and trial and error until you get into an image editing process that’s optimized for your website.
Use optimized image dimensions
When you upload images to WordPress, WordPress and your theme create multiple versions of them that are responsive enough to resize themselves automatically to fit your user’s screen size or the container dimensions within your theme.
This means that for the most part, you can probably get away with uploading your images at whatever size you created them at, so long as they’re not much larger than the container width you’re uploading them to.
Check your theme’s documentation or get in touch with your theme developer if you want to know the best image sizes to use for things like featured images, blog images, header images, etc.
The overall goal here is to use image sizes that are only a little bit bigger than your theme’s container widths. This will result in smaller images, which will result in smaller image files that won’t add too much weight to your web pages.
Doing so will also help whatever image optimization tool you use be that much more effective.
Lazy load images
One reason web pages load slowly is because they’re designed to load everything for each individual user that visits them.
This means if you have 12 images on a page, your visitor’s browser will try to load all 12 even if your visitor is still at the very top of the page.
Lazy loading is a functionality you can add to your images that prevents them from loading until they’re visible in the viewport of your visitor’s browser.
In other words, lazy loading prevents images from being loaded on your site until your visitor scrolls to them.
WordPress does have lazy loading available natively, but your theme needs to make use of the functionality.
The most effective way to implement lazy loading is to use a performance optimization plugin, such as NitroPack or WP Rocket.
These plugins will optimize your site in many ways.
Implement caching on your site
Page caching is an incredibly useful way to make images load faster on your site no matter how large they are.
With caching, images and resources are stored in your visitor’s browser so when they visit additional pages or revisit pages they’ve already browsed, stored content, such as images, is already available.
The end result is a page that loads much quicker than it did before.
Many modern caching solutions also enable features like preloading and prefetching cached content that anticipate your visitor’s next move and download a cached version of your web page before they even visit it, allowing it to load faster.
NitroPack is one of the best caching solutions available for WordPress and OpenCart. It also works for Magento and is especially optimized for WordPress’ most popular ecommerce plugin WooCommerce.
For WordPress specifically, certain hosts will offer their own caching solution. Some managed WordPress hosts like WP Engine and Kinsta generally don’t allow external caching plugins. However, WP Rocket is the exception for both of them.
Use a content delivery network
Page caching mostly improves performance for visitors who visit other pages on your website or revisit the same web pages.
A content delivery network (CDN) can load images much quicker for all users no matter where they are in the world.
With a CDN, you store images on edge servers located around the world. When a user visits your web page, that content gets served from the nearest edge location rather than your own web server.
This takes the pressure off of your web server, allowing the page to load quicker.
NitroPack offers a CDN that’s available on all plans, even the free one. It’s preconfigured, too, so all you need to do is install the plugin and connect your website to it.
NitroPack’s CDN is powered by Cloudflare, one of the most powerful CDN solutions available for the web.
It uses AWS, another powerful CDN solution, as a fallback so you always serve content from an edge location even if Cloudflare gets hit with an outage.
How to measure the effectiveness of image optimization
There are a few different ways you can measure the effectiveness of your image optimization efforts once you get started.
For starters, you can use an SEO tool like SE Ranking to monitor your rankings over time.
You can also record performance metrics for your top pages, before and after you implement image optimization.
Use your homepage as well as your website’s top three most-visited pages, and run them through Pingdom, GTmetrix and Google PageSpeed Insights.
For Pingdom, enter the URL for your homepage into the bar, and choose a server location that’s closest to where your target audience resides.
Once the tool analyzes your page, make note of the following metrics before you implement image optimization:
- Performance grade**
- Page size*
- Load time*
- Requests*
*You want this metric to be lower.
**You want this metric to be higher.
If you scroll down a little further, Pingdom also makes note of how much of your page’s size and number of requests are made up of images. Make note of these metrics as well. Your goal is to lower them.


For GTmetrix, make note of the following metrics:
- GTmetrix grade**
- Performance**
- Structure**
- Fully loaded time*
- Time to interactive*
*You want this metric to be lower.
**You want this metric to be higher.
Like Pingdom, if you scroll down a little further on your results page on GTmetrix, you’ll find image metrics based on your page’s total size and number of requests.


Google PageSpeed Insights is the most important tool on this list as it lets you see some of the data Google looks at as its web crawlers determine how to rank your pages.
When you use the tool, switch over to the desktop tab, and make note of the following metrics:
- Largest contentful paint*
- Interaction to next paint*
- Cumulative layout shift*
- First contentful paint*
- First input delay*
- Time to first byte*
*You want this metric to be lower.
You can also simply record the performance scores Google PageSpeed Insights provides for mobile and desktop if you want a simpler way to record Google’s data.
However, testing the metrics listed above can make it easier to pinpoint performance issues beyond image optimization.
The next steps
You should have all of these metrics saved in a spreadsheet or document for your homepage by now.
Go into your analytics, and make note of your homepage’s bounce rate. Your goal is to lower this metric.
Here’s a recap of all of the metrics we recommend gathering:
- Pingdom
- Performance grade**
- Page size*
- Load time*
- Requests*
- Total image file size (plus the percentage of your total page’s size)*
- Total number of image-based requests (plus the percentage of your page’s total requests)*
- GTmetrix
- GTmetrix grade**
- Performance**
- Structure**
- Fully loaded time*
- Time to interactive*
- Total image size*
- Percentage of requests that are image based*
- Google PageSpeed Insights
- Largest contentful paint*
- Interaction to next paint*
- Cumulative layout shift*
- First contentful paint*
- First input delay*
- Time to first byte*
- Analytics (such as Google Analytics or Clicky)
*You want this metric to be lower.
**You want this metric to be higher.
Record these metrics for your top three most-visited web pages as well.
Then, once you implement image optimization, run these four web pages through these tools again, and record each metric.
Compare the before and after results to see if image optimization improved your site’s overall performance and if you reduced the total size of each page.
How to optimize images for SEO
Because images have such a profound impact on performance and performance has such a profound impact on SEO, we thought it was important to share a few tips on how to optimize images for search engines.
These are the most important tips we have for this aspect of image optimization:
- Use short yet descriptive names for your images.
- Add alternative text to your images that’s identical to or just as short and descriptive as the image’s name.
- Use images that represent your brand or tone of your website.
- Always source images from high-quality stock photography websites.
- Create graphics and infographics for your website.
- Use Google Search Console to detect broken images.
Final thoughts
Creating optimized images for your website doesn’t need to be difficult.
For the most part, you can install a solution like NitroPack, connect your website to it, and call it a day.
NitroPack will compress your images, store and serve them from a CDN, and even resize them so they fit your theme’s container width.
Knowing how to optimize images for the web on your own can also be important. This mostly involves saving them at smaller dimensions and compressing them yourself with third-party tools.
Check out our guide on how page speed affects SEO to learn more about why you should worry about things like image optimization.
Disclosure: Our content is reader-supported. If you click on certain links we may make a commission.

